
Show me the POCUS
Surface Cardiac Ultrasound
In this chapter we will be reviewing the cardiac windows in order to perform a focused cardiac ultrasound examination. So we begin by understanding the acoustic windows we need in order to perform a cardiac ultrasound interrogation.
Introduction
This is not a full echocardiographic examination. Training in echocardiography is a multilayer process that requires extensive training and certification and not the scope of practice of the Anesthesiologist. Instead, focused cardiac ultrasound, which is a component of POCUS, was borne out of the need to have access to this powerful technology while not overburdening the provider with a detailed understanding of all the capabilities and only with a limited number of views.
The essence of Focused Cardiac Ultrasound (FoCUS) is mainly for a dichotomous interpretation of findings to answer questions that are crucial to the clinical decision-making process. It aims to gather sufficient information to assess physiologic status and the reduction of diagnostic uncertainty by narrowing the range of viable diagnosis. The diagnostic approach of FoCUS is qualitative or semiquantitative and the examination is conducted without the requirement of performing specific measurements. Qualitative appreciation of sizes and function (e.g., the right ventricle is dilated or nondilated, normokinetic or hypokinetic) or semiquantification of ranges of function (e.g., the left ventricle is hyperkinetic, normokinetic, hypokinetic, or severely hypokinetic) represents the modus operandi of FoCUS.
We start by becoming expert sonographers at performing the following 5 FoCUSed views.
In the following video lecture we go over the fundamental concepts on Cardiac POCUS or the Focused cardiac ultrasound examination by following this link:
FoCUSed Views and how to get them
Ideally patients should lie left lateral with left arm extended. It is likely however that you may not be able to change the position of the patient due to hemodynamic instability which may limit one or more of the following views. The phased array transducers used in cardiac imaging (2-8MHz) will be the probe you will be using. The subcostal view can also be obtained using the curved linear probe. In order to maximize your understanding of probe position and the cuts you are performing on the heart we encourage you to use the links between this page and the 3d model of the heart offered in Surface Planes.
Surface Cardiac 3D Model
The first step in this process is to become excellent sonographers. For this we will be using a 3D model to help us with the orientation of the placement of the surface cardiac probe. The stickers that appear in the following model represent the footprint of the cardiac probe. On close inspection you will see that each of the locations has a knob. This represents the orientation of the ultrasound marker or indicator. You will see this more clearly further down on this section. Click on the different footprints to go to those windows below.

Above, the bare chest of a 3D model. The markers represent the footprint of the cardiac probe when it is placed on the desired window. The knob represents the orientation of the probe marker. The views: Plx for parasternal long axis, Psx for parasternal short axis, A4c for apical 4 chamber, Subx for subcostal and IVC for inferior vena cava. The 3D model featured in this section was modified from Z-anatomy.
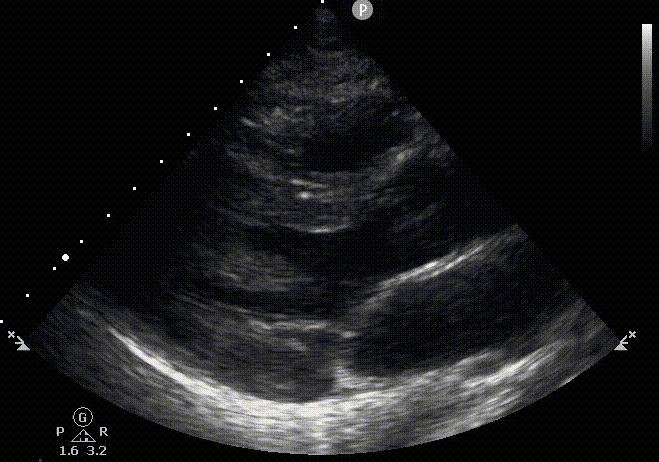
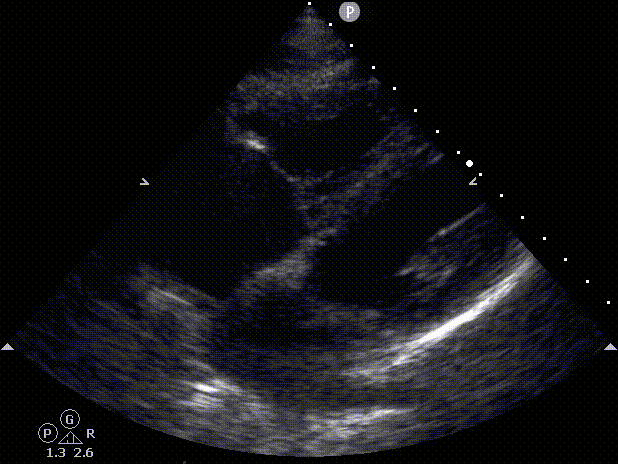
1. Parasternal Short Axis


RV
LV Ant
Inf
Lat
Parasternal short axis view being interrogated. Indicator to the left shoulder. Probe position between the third and fourth intercostal space. Rib numbers displayed on the surface of the rib cage. Mid papillary view seen on the lower right clip. RV, right ventricle; LV, left ventricle; Ant, anterior wall; Lat, lateral wall; Inf, inferior wall. Clips created with the use of Z-anatomy.
2. Parasternal Long Axis


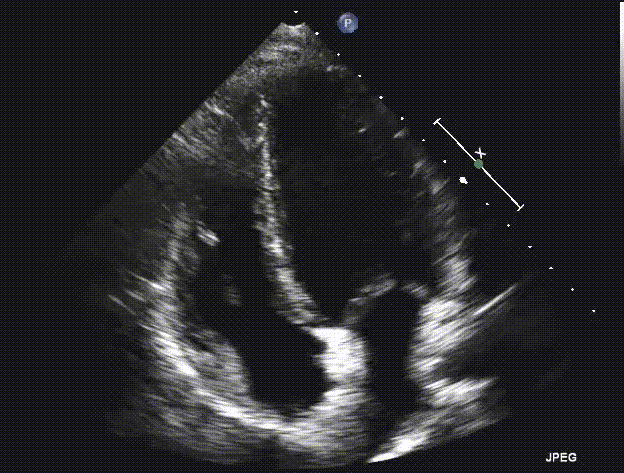
3. Apical 4 chamber


RV
TV
LV
MV
Left Atrium

IAS
Apical 4 chamber view probe placement. Probe placed in the 4th or 5th intercostal space. Orientation of the indicator towards the right between the 3-5 o' clock position. LV, Left ventricle; RV, Right ventricle; AV, Aortic valve; IAS, Inter atrial septum; MV, Mitral valve; TV, Tricuspid valve. Clips created with the use of Z-anatomy.
4. Subcostal view


5. Inferior Vena Cava view


References:
1. Zimmerman JM, Coker BJ. The Nuts and Bolts of Performing Focused Cardiovascular Ultrasound (FoCUS). Anesthesia and analgesia 2017; 124: 753-760.
2. Spencer KT, Kimura BJ, Korcarz CE, Pellikka PA, Rahko PS, Siegel RJ. Focused cardiac ultrasound: recommendations from the American Society of Echocardiography. J Am Soc Echocardiogr. 2013 Jun;26(6):567-81. doi: 10.1016/j.echo.2013.04.001. PMID: 23711341.