

Show me the POCUS
Ideally your institution should have a workflow integration system that allows images/clip acquisition after an order has been generated for POCUS. However some ultrasound systems may not have this feature integrated into the hospital system. Ultrasound machines may allow you to temporary save clips before you obtain patient identifiers which is often the case in the setting of an emergent scan. These clips can then be saved to a thumb drive and that is what we will be exploring in this chapter. There are several limitations to this approach since you are obtaining patient information by this method. Remember to follow your own institutions HIPAA policies.
Choose from any of the following ultrasound systems:


SAVING IMAGES TO YOUR THUMB DRIVE
Phillips Sparq Image Aquisition Steps:
1. Acquire Button
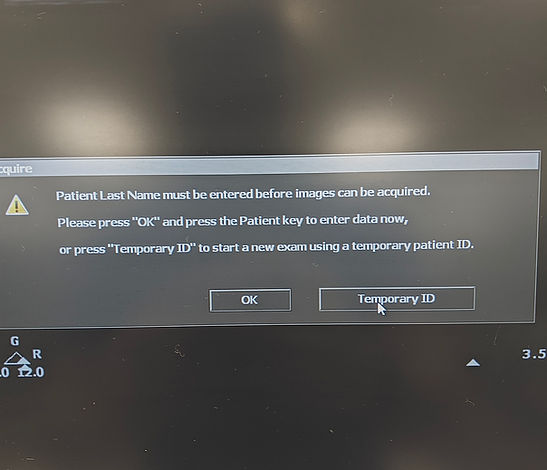
Hit the acquire button as indicated in the arrow. This will open a prompt to input patient information.


2. Temporary ID
Hit the temporary ID tab when the Acquire prompt appears.

3. Start Acquiring Images and Clips.
Start your POCUS exam and acquire your clips and images now by hitting the Acquire button on each individual clip you want stored on the machine. Your machine may make a sound when storing this images.
4. Confirm images are being saved.
On the right hand side of the display you will see a still of the clips you have obtained. After the exam is over you can review this clips before saving them. Here there are two clips that have been saved

5. Review clips and stills
At this point you have completed your exam. On the left hand side of the control panel you will hit the Review button.

6. Selecting export option.
Select Export Study tab on the menu bar on the display.


7. Saving export overview
In the following screen you will see an overview of the studies that are available on your device. You can select from all the studies that the machine has or select those that have not been uploaded since the last export (Studies created/modified after last export option). Toggle between these options until you can see the exam you recently saved. This typically appears as the first option on the screen.

8. Export destination
On the right hand side of the screen select the export destination tab and choose USB drive.

Selecting the Modify option will allow you to select the format in which the files appear: select either .avi or .mp4. Your system may be saving these images as DICOM images and so this option may be modified so that you can store these clips on a format that your computer can easily access.

9. Export files
The last step involves selecting the Start Export button on the bottom of the screen.

You now have your images saved on the thumb drive. It is important that you comply with HIPPA rules and regulations.

Fujifilm Sonosite X Porte Image Acquisition Steps:
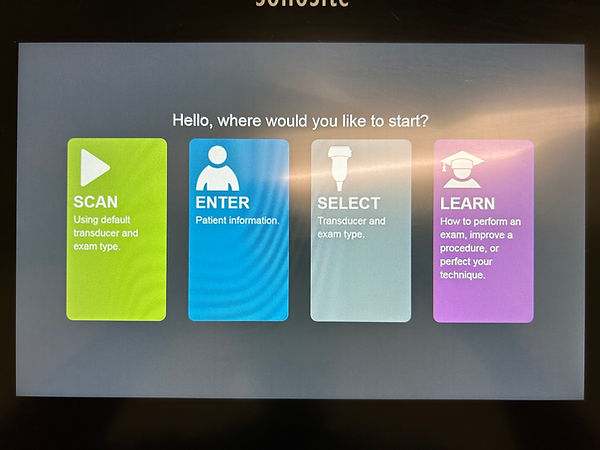
1. Select SCAN option
Select the scan option on the display.

2. Select Save Image or Clip
Select save image option on the bottom of the display. You may be prompted to input patient data.


3. End Study
Select End Exam when you have finished collecting POCUS data.

4. Review Study
Review exams to be exported by selecting review exam.

5. Select the exam and export to USB
Select the exam you wish uploaded to your thumb drive and in the bottom of your screen select export USB

